If you’ve ever stood at the top of a staircase and felt your foot land a half-inch off where you expected, you’ve felt what happens when rise and run aren’t calculated correctly. It’s the single most common mistake in stair building — and almost always avoidable with a little math before the first cut.
This guide walks through exactly how to calculate stair rise and run, the code limits that constrain your options, and how those two numbers flow into everything else: step count, stringer length, and whether your staircase will pass inspection.
What “rise” and “run” actually mean
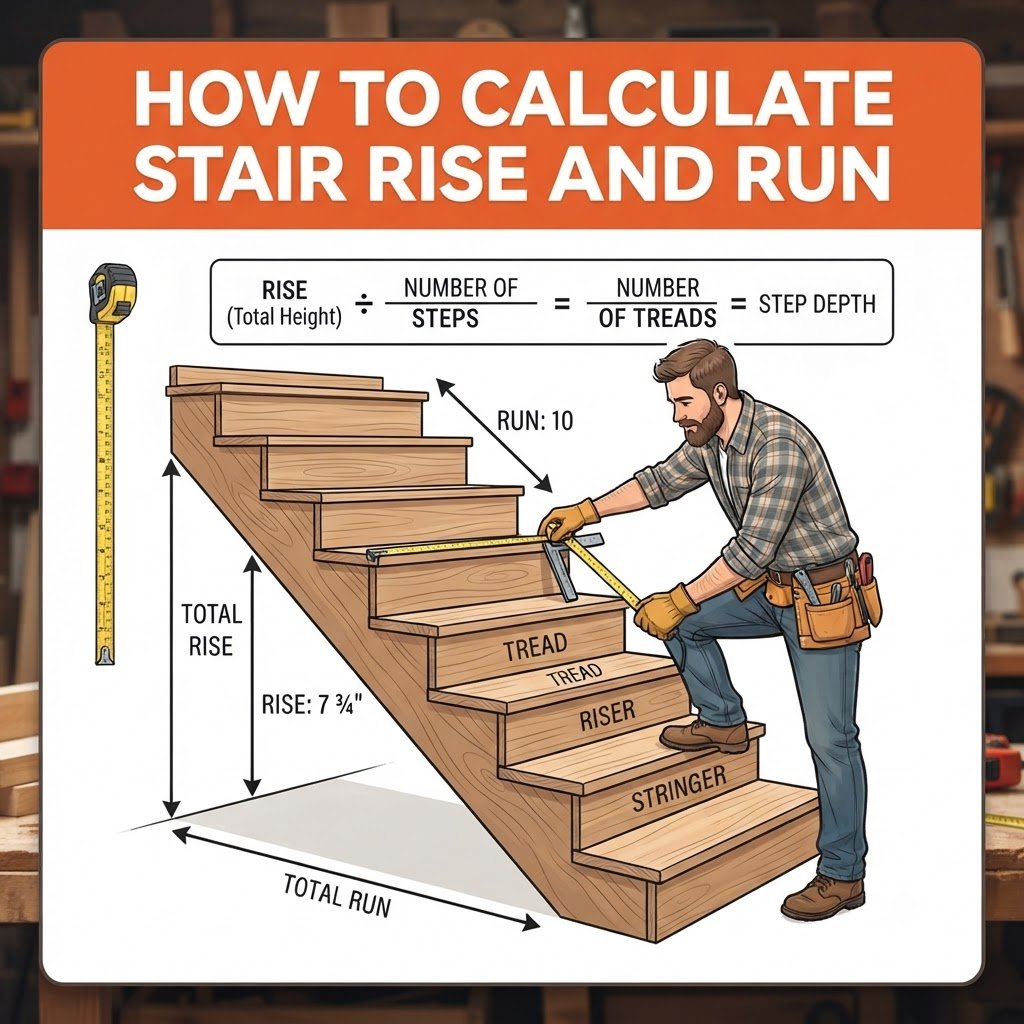
Total rise is the total vertical distance your staircase needs to climb — floor to floor, or floor to landing. Total run is the total horizontal distance the staircase covers.
Those totals get divided into individual steps:
- Riser height — the vertical height of one step
- Tread depth (unit run) — the horizontal depth of one step
Get the total rise wrong and every riser in the flight is off by a fraction — which is exactly the kind of error your foot notices even when your eye doesn’t.
Step 1: Measure your total rise
Measure the exact vertical distance from the finished floor at the bottom to the finished floor at the top, including the thickness of any subfloor or finish flooring that will be added later. This is the number the rest of the calculation depends on, so it’s worth double-checking with a laser level rather than a tape measure alone.
Step 2: Find your number of risers
Divide your total rise by a target riser height — most residential codes cap this at 7¾” — and round up to the nearest whole number. That whole number is how many risers your staircase needs.
Once you have a whole number of risers, divide the total rise by that number again to get your actual riser height. This is the number that keeps every step in the flight identical, which matters more to code inspectors — and to anyone walking the stairs — than hitting a “nice” round number.
Example: A total rise of 108″ ÷ 7.5″ target = 14.4, rounds up to 15 risers. 108″ ÷ 15 = 7.2″ actual riser height — under the 7¾” code max, and identical on every step.
Rather than run this by hand, the Stair Rise and Run Calculator does steps 1 and 2 in one pass — enter your total rise and it returns riser count, exact riser height, and tread depth together. If you just need the riser count in isolation, the Number of Steps Calculator handles that alone.
Step 3: Set your tread depth
Tread depth is where the 7-11 rule comes in — a rule of thumb (not a code minimum on its own, but a useful starting point) stating that riser height plus tread depth should land close to 17–18 inches. A 7″ riser generally pairs with an 11″ tread; a steeper 7¾” riser pairs with a shallower ~10″ tread. Most residential code sets 10″ as the tread minimum regardless.
The Tread Depth Calculator applies this ratio automatically against your riser height, and the Riser Height Calculator works the same relationship from the other direction if you’re starting with a fixed tread depth instead.
Step 4: Check your stair angle
Once riser height and tread depth are set, your stair angle is fixed — it’s not a separate decision. Most comfortable residential stairs land between 30° and 35° from horizontal; anything steeper starts to feel more like a ladder than a staircase, and anything shallower eats up a lot of floor space for the same total rise.
Run your numbers through the Stair Angle / Pitch Calculator to see where you land, and if you need to compare that angle against a slope percentage for a permit drawing, the Rise/Run Ratio to Degrees Converter handles the conversion.
Step 5: Size the stringers
With riser height, tread depth, and total rise locked in, you can calculate stringer length — the diagonal board that carries the treads. This is also the point where most people discover their staircase needs a landing partway up, since a single stringer can only span so far before it needs intermediate support.
The Stair Stringer Calculator takes your total rise and run and returns stringer length, cut angles, and how many stringers your stair width needs. If you’ve settled on standard 2×12 lumber for the stringers specifically, the 2×12 Stringer Board Calculator factors in the material’s actual usable depth after the cuts.
Common code limits to check before you build
Code requirements vary by jurisdiction and by whether the stair is residential or commercial, but these are the figures that come up most often under the IRC and IBC:
| Element | Typical residential (IRC) limit |
|---|---|
| Maximum riser height | 7¾” |
| Minimum tread depth | 10″ |
| Riser height variance within a flight | ⅜” max |
| Minimum headroom | 6’8″ |
| Minimum stair width | 36″ |
Don’t take that table as final — local amendments change these numbers regularly, and commercial or egress stairs follow a different set of IBC limits entirely. Run your actual numbers through the IRC Stair Code Checker before you build, and if headroom is tight in your space, the Stair Headroom Calculator is worth running early — it’s one of the harder constraints to fix after framing is done.
Putting it all together
In order, the calculation flow looks like this:
- Measure total rise
- Divide by target riser height, round up → number of risers
- Divide total rise by that whole number → actual riser height
- Apply the 7-11 relationship → tread depth
- Multiply tread depth × (risers − 1) → total run
- Use total rise and run together → stringer length and cut angles
Every one of those steps has its own calculator linked above, but if you’d rather not juggle five browser tabs, the Stair Rise and Run Calculator runs steps 1 through 5 from a single total-rise input and shows its work against the cited IRC section at each step.
Note: These calculators are planning tools, not a substitute for a licensed professional or your local building inspector. Confirm final dimensions against the code your jurisdiction has actually adopted before you build. See our Terms of Service for details.

The My Stair Calculator Experts team brings together decades of hands-on experience in stair design, carpentry, and construction. We’re driven by a simple mission: turning complex building codes and technical calculations into clear, practical guidance — so whether you’re a licensed contractor or tackling your first home project, you can build with confidence.
Leave a Reply